Showing posts with label Tools. Show all posts

International Voltage Converter - Step Down 220V to 110V

If you are the person who often travel around the world but needs to use his or her personal electronic components such as hair dryers, camera, camcorder, iPods, shavers and etc... 

Then it is important for you to have an 'International Voltage Converter'. This device allows you to convert voltage to the level required by your electronic components.

As an example, lets assume that you own a smartphone with a charger that must only be plugged into a 110 volt outlet but the country you are currently visiting or about to visit have a 220 volt power source on their outlet. 

Insisting of plugging your electronic component with a rating requirement of 110V right into a 220V outlet source is highly dangerous. This can lead into fire and electrocution.

The solution into this kind of problem is to use an international voltage converter where in the example above, this device will 'step-down' the 220V to 110V. 

There are already numerous competing products of international voltage converters in the market but before purchasing any one of them, you have to make sure that the features meets your needs. 

Since its an international converter it should support Europe, Australia, North & South America, U.K., Hong Kong, Africa, New Zealand, India and the rest of other Asian countries.

Take note that most international voltage converters are not intended to be used on electronic components that requires or consumes excessive amount of power such as your TV, Desktop computer and any household appliances. 

If you do so then the converter will sustain permanent damage and worse, you might get accidentally injured by it.


International Voltage Converter Plug Adapter Travel Kit


Browsing the web, I had encountered the VCT International Travel Voltage Converter (Dual 50 Watt/1600 Watts) which is a light duty converter made perfect for travel. 

According to the product description, what this device specifically does is to convert foreign electricity of 220/240V down to 110/120V of high wattage 'travel heating appliance'.

What does travel heating appliance means?

It means that while it is being used, the converter will get hot. We can then speculate that the designed might be a resistive load

If this is the case then using it on an electronic household appliance will result into the converter from being fried in almost an instant. 

This is the reason why you are not allowed to use Household appliances.

In my search for the best international voltage converter for travelers, I do not seem to find any good product as of these days. 

The majority claims that they easily get damaged or it doesn't last long enough wherein its just a complete waste of money. 

However, I'm pretty sure that a certain manufacturer will soon be able to find a way to achieve perfection for this kind of product.

How Do Volt Ohm Meter Work?

If it happens that you are a hobbyist who often use the VOM tool on your projects, you might come to the point asking yourself about how does this magnificent tool work? Students taking up the field of electronics will also be asked by their instructors to conduct a research about how this tool works. Thus, it is the main subject of this article that will offer you a good explanation.

The primary core of the Volt Ohm Meter or VOM is the Electrical Meter, it is a small electromagnetic coil that carries the current that are to be tested. Along with this electromagnetic coil is a permanent magnet placed at the poles. This works by restoring the force or pulling back the two spiral hair-springs at the default level.

When current is applied on the coil, movement will occur and there is a positive sign that there is a presence of electric current flow. There are four characteristics of electrical properties that you can test with your Volt Meter and they are the Voltage, Ohms, Current and Resistance. Among them that you have selected, a flow of current will always pass through the coil to provide you the output.

In reading Voltages, a group of resistors are connected in series to the coil. They vary in values allowing you to make a selection range for voltage to be measured. The same concept is applied on the current except that the resistors are connected in parallel with the coil. Finally is the Resistance or Ohms, there is no supplied source of power unlike the Voltage and Current. This makes the reason that the VOM contains a Dry Cell battery. Exactly just like the Voltage principle, a series of resistors are connected to the coil to output the value of the tested circuit.


After reading this article, you might also come into doubt or curiosity on how does a DMM or Digital Multi-Meter work?


Digital Multi-Meters works exactly the same as the analog VOM but the differences is that most parts are electronically upgraded. The primary core of the analog meter was substituted with a voltmeter. The Meter-Scale has been substituted with graphic display that will show you direct results in the form of numeric numbers. And the same goes with the other parts which makes the DMM output a more accurate measurement.

How Do You Use a Volt Ohm Meter?

The Volt Ohm Meter is more commonly known as "VOM". It is a type of tool where you can use it to gauge electrical properties such as Resistance, Voltage and Current. There is another version of this tool which is known as the Digital Multi-Meter or DMM. However, it is still preferred that you make use of the traditional VOM especially when you are a student or hobbyist starting to learn the field of electronics.

So how do you use a Volt Ohm Meter (VOM)?

Before we can learn how to use this type of tool, you need to know the parts and their functions. Below are the basic parts that you will most likely going to make some adjustments before you can begin reading values from your circuits:

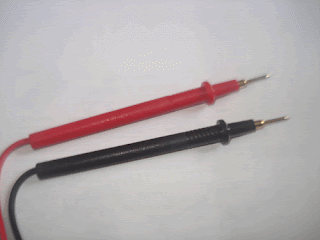
Test Probe

You will have two test probes that are distinguished in their Red or Black color. The Red Probe indicates the positive terminal while the black denotes the negative terminal. It is important for you to know on the part of your circuit the location of the ground since it is where you will most likely going to connect the negative test probe. Connecting the probes in reverse polarity could damage the equipment and it will no longer produce accurate results.

Test Probe

Scale Meter

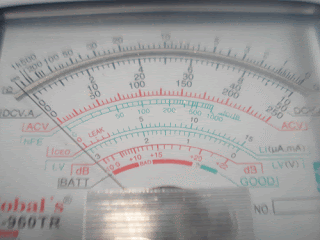
The Scale Meter consists of numbers and series of gradations. This will provide you a reading result with two decimal places. Reading is done by checking on the meter-pointer on the scale. The pointer should fall under a certain range of level then count the series of gradations to the exact tip of the pointer. You may then multiply that value on the value of the Selector Scale that you have selected.

Meter Scale

Selector Scale

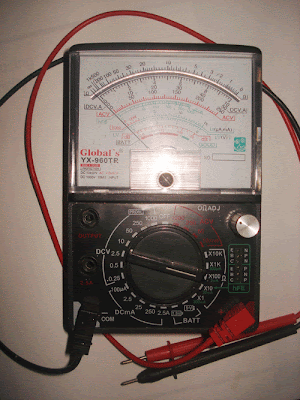
On the middle part of the analog meter, there is a huge rotating knob and this is the Selector Scale. This is the first part of the tool that required adjustment before use. If you are going to conduct a reading about voltage then you need to turn the knob on that scale. Beside from the Voltage (DC and AC), you can also do a reading in Amperes and Resistances.

Selector Scale

Zero Corrector

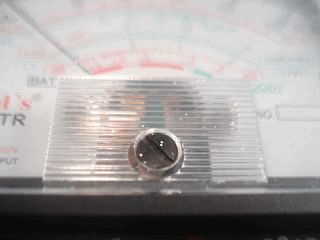
Just below the Scale Meter, you will find there a small rounded button. This is the Zero Corrector. It is used to adjust the meter-pointer to point at the exact starting level. Adjusting it will require you to use the flat screw-driver and you should be gentle when making your adjustment.

Zero Corrector

Zero Ohms Adjust

Reading resistances will require you to adjust the Zero Ohms Adjustment knob. It is simply a small rotating knob that you can easily find on your VOM. Normally, it is located on the lower right bottom of the Meter Scale. Before reading resistances, you need to make sure that the meter-pointer is set at the exact starting level. Failure to make this adjustment will result in an inaccurate values.

Zero Adjustment Knob

Steps in using the Volt Ohm Meter:

Depending on the type of electrical properties that you need to read, you must first adjust the Zero Corrector adjustment setting. It is often adjusted by the manufacturer but there are some instances where they are not. Take note, you cannot adjust it by hand where you need to make use of a flat screw-driver.

The next step is to adjust the Selector Scale. If you wish to read Voltages then you need to rotate the knob and select the option. There are two types of voltages which are DC and AC. The DC levels are used to measure "Direct currents", voltages with polarities. The AC levels is the opposite of DC and stands for "Alternating Currents". The same procedure applies when reading Currents and Resistances.

After setting-up those necessary adjustments, you may now hold your test probes with your hands and begin testing some areas in your circuit. Good luck...

The VOM and DMM Multi-Meters

The VOM and DMM are both multi-meter devices where it functions as a valuable tool in reading electrical properties such as Resistance, Current, Voltage and etc... Electricians, Electronic Technicians, Students (taking-up related technology courses) and hobbyist makes use of this tool on their projects. Without the use of VOM and DMM, we wont be able to conduct repairs on our broken equipment or devices. We also wont be able to make those wonderful projects and etc... Moreover, there are differences between these two type of tool which is what we are going to discuss on this article.

VOM

VOM stands for "Volt Ohm Meter". It is the traditional measuring device that are commonly used by an Electronic Technician. They are using it to diagnose any broken equipment to determine the defective component for replacement. The use of this tool requires some skills in reading the scale-chart.


DMM

DMM stands for "Digital Multi-Meter". It is the same tool as the VOM but the main difference on the output is that the DMM displays the values in direct numbers. The output can also be setup to four decimal places providing you with a more accurate result. However, the output is usually unstable especially on the last four decimal places.


Both of these Multi-Meter tool consists of two test probe. One is color Red and black is the other. The red probe indicates the positive polarity while the black is for the negative polarity. It is very important that you should always be aware on the part of the circuit where you make contacts with your test probes. Take note that the analog VOM meter cannot provide you negative readings unlike the DMM. Another important to remember when using the VOM is to avoid connecting the test probe in reverse polarity because it can damage the tool.


The VOM are recommended on those simple circuits since accuracy doesn't really matter and there is a huge range of level for the required output. DMM are used on highly sophisticated circuits that needs to output accurate measurement and such equipment are the Oscilloscope, Multi-Meters and other measuring devices that generate highly precise measurement.

There are advantages and disadvantages between these two Multi-Meter devices but there is still a huge debate on which of them are the best tool to use. I guess it's all up to you to decide whether to use one of them or simply both.

Advantages of Digital Meter Over the Analog

Digital and Analog multi-meter devices are both the same equipment in measuring various characteristics of an electronic components. However, there are some differences between these two tools. Many Technicians, Students and Hobbyist do prefer the use of the DMM (Short term for Digital Multi-Meter) over the traditional Analog VOM (Short term for Volt Ohm Meter) and vice-versa. For whatever reason, users have their own reason.

On this post, we will be dealing about the advantages of using the Digital Meter DMM over the classic Analog type VOM. It is already assumed that you have already seen these two types of electronic equipment, hold them on your hands and adjusted the settings to a certain level. If you are a student then you can go to the lab and borrow the equipment provided by your school. Hobbyist can buy this tool at a cheap prices and there are hundreds of them that are available on the market.

Anyway, what are the Advantages of the DMM?

Output Display

It is easy to gauge a reading through digital multi-meter since the output is automatically displayed in numbers through a Seven Segment Display. Unlike the analog type, you need to take a closer look into the meter scales and read the values. It takes time and human errors could occur especially for those who have poor eyesight.


Accuracy

Digital-Meters shows more accurate values than the Analog. Depending on the type of equipment that you are using, it can output up to four decimal places that the Analog type could never show.

For some reasons, the output generated by the digital type is unstable. It often changes with slight increment value that goes up and down. Most likely, anyway values within the range of fluctuations is considered valid.

Auto Polarity

You can read negative values and a good example is voltage. Placing the probes into the opposite polarity will result into a negative output. This is the huge advantage of making use a DMM over the VOM since doing this on the analog type can cause the equipment to be broken.

DMM

VOM

Today, both type of these tools are currently being improved by the manufacturers. You can find on the market some advance multi-meter tools that can provide you with graphical display and other data. This helps that user reduce the effort and time in manually calculating the data and minimize the errors that can be encountered.

Analog and Digital Multi Meters

One of the main tools of an electronic technician is a "Multi Meter" tool which can either be "Digital" or "Analog" device. The digital version is more commonly referred as the "DMM" (stands for Digital Multi Meter) while the analog version is known as the "VOM" (stands for Voltage Ohm Meter). Despite the difference, both of these device have the same purpose which is to measure different properties of electricity such as voltage, current and resistance.

Multi Meter tool either analog or digital needs to be adjusted by pressing the buttons or rotating the knobs into the type of unit that you would like to read. In order to make an actual reading of a certain component, you have to use the two wired pointers which is a red and black color probes (more commonly known as "test probes"). The red colored pointer actually indicates positive polarity while the black colored pointer is the negative polarity or ground.

Let's say for example that you are going to read the voltage rating of a certain battery. Before you do, you have to make sure that you set the tool into the its proper "voltage" setting.

Next step is to hold the wired pointers with your hands. One pointer on each of your hand. If you are a right-handed person then it's best to always handle the red or positive pointer on your right while your left hand holds the black or ground pointer.

Now, attach the tip of the red pointer into the positive side of the battery while the black pointer goes to the negative polarity. If it happens that you did your connections in an opposite way, you will get a negative reading. But if you did it correctly, the voltage rating of the battery that you tested can be read on the screen of your multi meter tool.

Digital Multi-Meter

Speaking about the screen, the DMM screen will directly display the numerical output. However, VOM displays its output on a scale so you really need to have a good eyesight.

As a second example, I suggest that you should try to read a resistor this time. A resistor component does not have a polarity so feel free to attach your pointers to any of its two legs.

When using a DMM, you will notice that the numerical output value on its screen display hardly fluctuates in value. It is very unstable that you can't decide what exactly are the last decimal digits. Now when it comes to the VOM, the reading that you will get is a lot more stable in value.

Reading Negative Unit Values with your Multi Meter Tool


Let's go back to our battery example above. I have mentioned that when you attached the test probes in the wrong side or polarity of the battery, this will result into a negative value.

VOM Multi-Meter

When using a VOM and let's say that you have mistakenly connected the test probes at the wrong sides of the battery, the needle on the scale will flip on the left side most indicating the value of "infinity" or "zero". But when it comes to the DMM, the output screen display will show the negative numeral voltage value of the battery.

Moreover, analog and digital multi meter tools have their own advantages and disadvantages. Based on my experience, I actually prefer to use the VOM for testing and trouble-shooting purposes. While, I use the DMM when working on something that really requires an accurate reading.